
Adding support for iOS' safe areas in your web app
30 apr 2022
Hello there, person reading this!
Chances are you found this page through me, sending you this very post since you did it wrong. Please allow me to apologize for my future self being a jerk.
I only did it to make your website or web app better!
When building a web app you’d like to support on Safari (and you should!), you should add a safe area to your header, your footer, and also your content.
Add a safe area for your footer
Something I often see is apps not adding in a safe area for their footer. This causes the content of the footer to be shown behind the white bar iOS and iPadOS use for navigation, which makes it harder for users to tap your links or use your footer.
Luckily, Safari has an easy remedy. You can use env functions in CSS to get the amount of space you need for your footer to be easily usable on iOS. Depending on if your footer is floating at the bottom detached from the sides or not, you’ll want to add either some padding, or to add more margin from the bottom. This is doable through env(safe-area-inset-bottom).
Be careful with your box-sizing, as it can mess up your design if you add too much bottom padding without considering the height 😎
A simple solution to a footer would look like this:
footer {
/* ... other footer styling... */
padding: 0.5rem;
padding-bottom: calc(0.5rem + env(safe-area-inset-bottom));
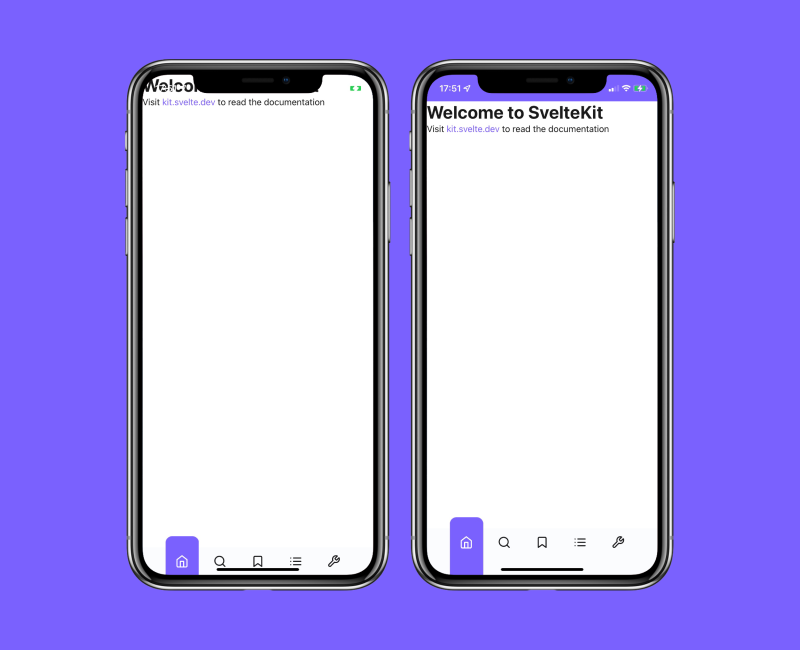
}Compare these screenshots of the difference between having and not having the safe area on your footer:
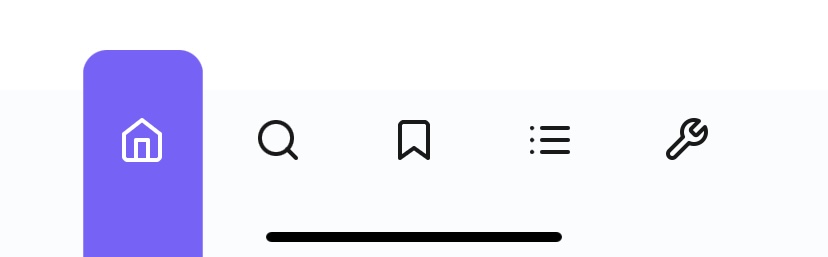
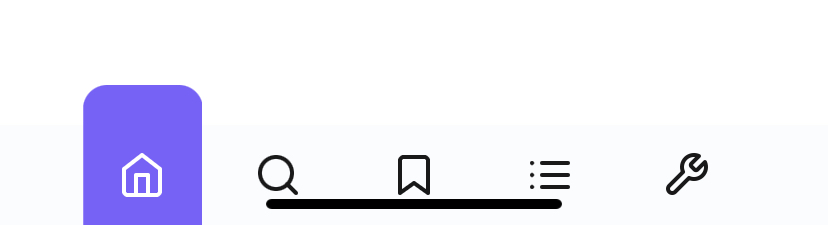
Not having a safe area makes your app a lot harder to use for your users, in addition to making your app look cheap.
Adding a safe are to your header
If your site or app is going to be used in standalone, you should add a safe area to your header. Using env(safe-area-inset-top) is the value that is the height of the notch, unless there are other elements above your elements.
For example: if you have a browser header above the notch, env(safe-area-inset-top) will be 0 since the browser’s top bar is already taking care of that safe area.
If you don’t have a traditional header, consider adding an extra element that’s only the height of the safe area, with a nice background.
Compare these screenshots:
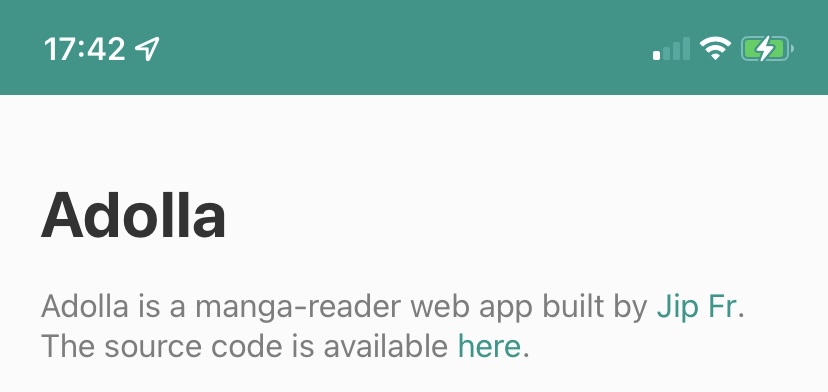
Be sure to also make it so your content is offset from the safe area. If you don’t, your content might become hard to read since the status bar’s content might overlap with your content.
Making your site look good in landscape mode
By default, iOS just “crops” your website in order not to make it full width. There are, however, various situations where you want your body to be your screen’s full width. To make your site take the full width in landscape mode on iOS, you need to add viewport-fit=cover to your viewport meta tag, like so:
<meta name="viewport" content="width=device-width, initial-scale=1.0, viewport-fit=cover" />You should also be sure your content is always visible and accessible. If you don’t your content could very well appear behind the notch.
For this, you can use env(safe-area-inset-left) and env(safe-area-inset-right) to get the safe area for each side. You can use this the same way as you did the other values.
Be careful in just mindlessly adding this. If you add it without thought, it’s possible elements that should be full width (like a background image for your hero, or a border on the bottom of your header) will not be anymore, and that will look cheap.
A short explanation about this can be found on CSS Tricks.

Adding a theme color
You should also add a theme color to your site. This is a color that is used to change the color of the status bar on iOS. Under certain status-bar types (it’s possible to make it transparent, but it’s not by default), the status bar will also change color to match the theme color.
I won’t write too much on this, but you can check out this post on useyourloaf.com for more on this.
Thoughts? Questions? Concerns? E-mail me!